 Battle
of Isandlwana (1879 AD)
Battle
of Isandlwana (1879 AD)Fast Play Rules for Students
Battle
of Isandlwana (1879 AD)Historical Background: Zulu Wars (1879 AD)
During the reign of Queen Victoria Great Britain built an impressive empire that spanned the globe. One of their most colorful military campaigns took place in 1879 when the British provoked a war with the Zulus in South Africa. The British expected a quick and easy victory but the Zulu warriors were no pushovers. The British advanced into Zululand and camped near a rocky hill known as Isandlwana. The British strategy was to win the war by forcing the Zulus to attack them after they had taken up a secure defensive position so that their firepower advantage would be decisive. The Zulus didn't cooperate, however, and attacked the unprepared British camp. Using their battle tested "horns of the buffalo" encirclement attack the Zulus overwhelmed the British before they could mount an effective defense. The British rushed reinforcements to Africa and eventually won the war, but Isandlwana was the most disastrous defeat the British ever suffered at the hands of a native force.
 Battle
1: The Zulu commanders
were a nervous bunch as they looked at the British forces in their
splendid red uniforms. The Zulus would have to advance across
open ground to get close enough to use their traditional weapons
- leather shields and spears. The attack began with the Zulus
overwhelming the British advance guard and trying to flank the
British on the left and right. The British moved quickly to establish
a defensive line, and Zulu casualties began to mount. On the left
flank The British commanders set up an impenetrable firing line
and blasted wave after wave of Zulu attackers. The Zulus had more
success on the other flank. Disaster struck the British when the
Natal Native Contingent panicked and ran, leaving a big hole in
their lines. The Zulus gleefully charged through the opening and
looted the British camp. With chants of "Zulu! Zulu!"
the Zulu's sent in their reserves to steamroll the British right
and center. As the battle ended only the British left had survived
the battle. This was a Zulu victory, but the British had fared
much better than their historical counterparts.
Battle
1: The Zulu commanders
were a nervous bunch as they looked at the British forces in their
splendid red uniforms. The Zulus would have to advance across
open ground to get close enough to use their traditional weapons
- leather shields and spears. The attack began with the Zulus
overwhelming the British advance guard and trying to flank the
British on the left and right. The British moved quickly to establish
a defensive line, and Zulu casualties began to mount. On the left
flank The British commanders set up an impenetrable firing line
and blasted wave after wave of Zulu attackers. The Zulus had more
success on the other flank. Disaster struck the British when the
Natal Native Contingent panicked and ran, leaving a big hole in
their lines. The Zulus gleefully charged through the opening and
looted the British camp. With chants of "Zulu! Zulu!"
the Zulu's sent in their reserves to steamroll the British right
and center. As the battle ended only the British left had survived
the battle. This was a Zulu victory, but the British had fared
much better than their historical counterparts.
Battle 2: . This time the Zulu commanders executed the
"horns of the buffalo" maneuver to near perfection.
The British advance guard was force to retreat or die. Soon the
Zulus were applying strong pressure on the British front and both
flanks at the same time. The desperate British commanders begged
each other for reinforcements but all the reserves had already
been deployed. The British artillery proved particularly inept
at hitting targets and was smothered in an avalanche of angry
Zulu warriors. The British collapsed completely except for the
troops under the command of one cautious commander. He managed
to get one of his units to safety, but this was a total victory
for the Zulus.
Rules
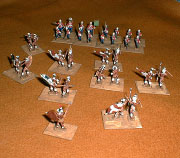
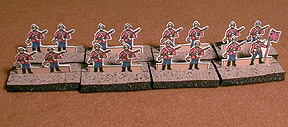
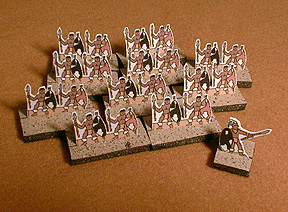
The Miniatures: The figures used were 1/72-scale plastics mounted two per stand from Esci miniatures. The figures can be hard to find these days, but they're worth the effort. Eight boxes of Zulus made up my native force. The figures that had uniform coats and rifles were painted red and used for the Natal Native Contingent. This made them a lot better armed, dressed, and equipped than their historical counterparts, but it made it easy to pick them out on the battle field. Zulus were mounted two per stand, but if you have a hard time finding enough go with one per stand. Sixteen regal looking Zulus were picked out and mounted individually to represent Zulu leaders. A red feather made them easy to spot in the thick of battle. My British force was built with five boxes of Esci British colonials. They were all painted with red uniforms and green facings and mounted . These figures were used for the British regulars and also the native horse units. I painted two horses I had left over from an Imex cavalry box, put them each on a stand, and put them with the native horse units to indicate that they had mounts. Ten command stands were made by adding a flag (from www.warflag.com) to one of the figures. The British box also contained figures kneeling beside boxes and these were used for artillery crew. The two 7 pdr cannons came from another box of figures, probably an Imex civil war set. Here are some paper soldiers you can print and use.
|
British: Each British company includes : Each Native Horse Unit includes : Each Natal Native Contingent (NNC) Battlalion
includes : In Front of Camp On Right Flank In Camp |
Zulus: Right Horn: Left Horn: Center Chest: |
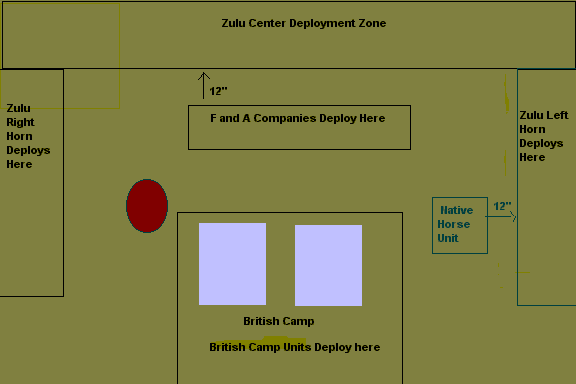
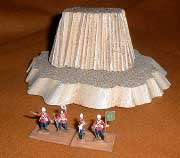
The Board: A 7.5 X 5 foot table was used. The terrain was flat except for Isandlwana, which was a foam hill. A piece of felt would be a reasonable substitute. Two rectangles of felt were used to indicate the location of the British camp.
Deployment: Each unit must deploy in its box. British units should be in a double rank line (4 stands in front, 3 or 4 stands in the second rank). Zulu units should be in a group formation with all ten stands in contact. British command stands may be part of a unit, or separate. Zulu leaders should be deployed behind the Zulu front line units.
Sequence of Play:
1. British Move
2. British Shoot
3. Zulus Move
4. British Shoot
5. Zulu spears
6. Melee
 Movement: British and NNC infantry may move 6".
Native horse units and British artillery may move 12". Zulu
units move 6", however if they start their move within 9"
of an enemy unit they may declare that they are charging into
melee and then may move up to 9" into contact with the enemy.
Movement: British and NNC infantry may move 6".
Native horse units and British artillery may move 12". Zulu
units move 6", however if they start their move within 9"
of an enemy unit they may declare that they are charging into
melee and then may move up to 9" into contact with the enemy.
Shooting: All British units may shoot. Roll 1D6 for each stand in range (up to 24" for rifles, unlimited range for artillery). British command stands roll 2D6 when shooting. British infantry and native horse units hit on a 5 or 6, NNC units hit only on a 6. If any part of a unit is in range the entire unit may fire. Cannons hit on a 4-6, and if they hit they inflict 1D6 casualties. All hits remove one stand of Zulus. Zulu units that are locked in melee cannot be shot at by any British units except the one they are fighting in melee.
Zulu Spears: Only Zulu units that have charged into melee this turn may throw spears. Roll 1D6 for each stand in the charge. Every roll of 6 removes one enemy stand
Melee: Each side rolls 1D6 for each stand in the fight.
British command stands roll 2D6. Every 5 or 6 rolled eliminates
one enemy stand. Both sides roll simultaneously. If both units
still have stands left they remain engaged and fight again next
turn. Artillery crews do not fight in melee. If any Zulus are
in contact with them during the melee phase the crew is eliminated.
NNC Morale: The NNC were poorly equipped and led. The first time a NNC unit begins its turn within 9" of a Zulu unit it must take a morale check. Each unit must only test once per game. The unit rolls 1D6. If the roll is a 5 or 6 they rout and are removed from the table. If the roll is a 1 - 4 they fight on as normal.
British Camp: The tents of the British camp interfere with British shooting. A line of sight may be traced out of or into the British camp for purposes of shooting, but a line of sight may not be traced completely through the camp.
Last Stand: If a Zulu unit is reduced to one stand this last stand is removed immediately. The British do not remove their last stand, they have enough problems to deal with.
Zulu Leaders: Zulu leader figures do not fight and cannot be killed. They are used to bring in the Zulu reserves. Zulu commanders may trade in a leader figure for a fresh 10 stand unit of Zulu warriors at the start of their movement phase. The leader figure is permanently removed from the game and the new unit is placed on the board at the same place that the Zulu leader was located. The Zulu replacements come out of the Zulu casualties. If the Zulus do not have enough casualties to make a 10 stand unit they must wait until a later turn. Zulu leaders may move 6" per turn but must always remain behind the Zulu front line units.
British Command Stands: British command stands roll 2D6 rather than 1D6 when shooting or fighting in melee. They move at the same speed as the units they are commanding. If a command stand is alone it may be eliminated just like any other stand. If the command stand is attached to a regular unit the command stand will be the last stand eliminated.
Victory Conditions: A British commander can claim victory
if any of his units survive the battle. The Zulu objective is
to loot the British camp and wipe out the British infantry.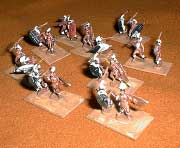
Resources: A search of the Internet, county library, and Magweb, turned up some useful resources for wargaming Isandlwana.