 Kursk
- Taming the Tigers
Kursk
- Taming the TigersFast Play Rules for the Battle of Prokhorovka (1943)
Kursk
- Taming the TigersHistorical Background: The German invasion of the USSR in 1941 was, at first, a smashing success. However by 1943 the German army was on the brink of disaster. The Soviet army had stopped Germany's momentum, most notably at Stalingrad. The Red Army was gaining strength, adding the men and machines it would need to go onto the offensive. Hitler decided to gamble on a massive armored assault designed to force the Soviets out of the war before the Allies could open a new front in Western or Southern Europe. The Soviets anticipated the German attack at Kursk and prepared the battlefield with dense mine fields, trenches, and well hidden gun positions. They also assembled an enormous reserve force. Their plan was to grind down the Germans in the defenses. When the German attack was exhasuted, and the last of their reserves were committed, the Soviets would launch a massive counterattack. The plan worked. The Soviets absorbed the ferocious German attack, then went on the offensive. They would remain on the offensive until the fall of Berlin. The battle of Prokhorovka, near the end of the Kursk campaign, was the largest tank battle in history.
 Battle
1: The initial artillery exchange was mostly ineffective,
but one of the Tigers was among the few casualties. Both sides
advanced and the Germans deployed a strong force to protect the
left flank when the Soviets threatened to outflank them. The surviving
Tigers went to work at long range, and began hitting their targets.
A force of T-70s rushed into the center of the battlefield, using
the forest for cover until they were close enough for their little
guns to do some damage. The Germans responded aggressively, moving
most of their tanks into close range of the advancing Soviets.
Casualties mounted rapidly on both sides.
Battle
1: The initial artillery exchange was mostly ineffective,
but one of the Tigers was among the few casualties. Both sides
advanced and the Germans deployed a strong force to protect the
left flank when the Soviets threatened to outflank them. The surviving
Tigers went to work at long range, and began hitting their targets.
A force of T-70s rushed into the center of the battlefield, using
the forest for cover until they were close enough for their little
guns to do some damage. The Germans responded aggressively, moving
most of their tanks into close range of the advancing Soviets.
Casualties mounted rapidly on both sides.
The Soviets had the edge in the air battle for most of the game, and used their advantage to pound the German right flank. The German artillery responded in kind, punishing the Soviets with uncanny accuracy while the Soviet shells had an alarming habit of falling short on their own tanks. The Soviet numerical advantage began to takes its toll, and the Germans saw their chances of victory slipping away. They concentrated their remaining tanks on a hill on the left flank. Here they made their last stand. The battle was a Soviet victory.
 Battle
2: The Germans launched
an ill-advised attack on the powerful Soviet right flank. The
Soviets dispatched it with ease, leaving the outnumbered Germans
in dire straits. Heavy artillery barrages battered both sides.
In the center the battle evolved into a close range knife fight.
Surprisingly, the Germans gained the advantage in the chaotic
fur ball. The shattered German left withdrew to a hill to make
their last stand. The Soviets plastered the hill with accurate
artillery fire, destroying the last of the Tigers. The Soviets
overran the position and turned the flank, driving hard into the
German center. Resistance collapsed in the face of the powerful
onslaught, and the battle ended in victory for the Soviet Union.
Battle
2: The Germans launched
an ill-advised attack on the powerful Soviet right flank. The
Soviets dispatched it with ease, leaving the outnumbered Germans
in dire straits. Heavy artillery barrages battered both sides.
In the center the battle evolved into a close range knife fight.
Surprisingly, the Germans gained the advantage in the chaotic
fur ball. The shattered German left withdrew to a hill to make
their last stand. The Soviets plastered the hill with accurate
artillery fire, destroying the last of the Tigers. The Soviets
overran the position and turned the flank, driving hard into the
German center. Resistance collapsed in the face of the powerful
onslaught, and the battle ended in victory for the Soviet Union.
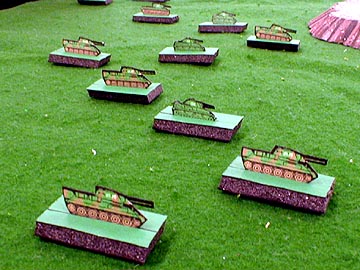
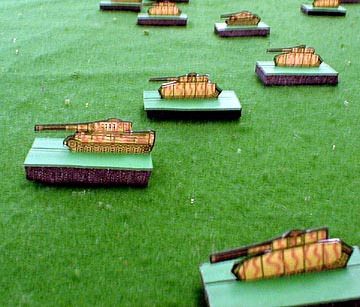
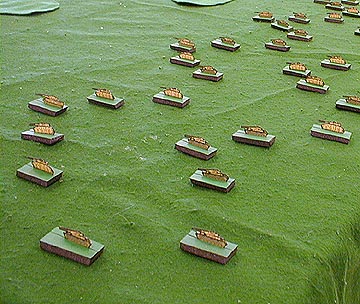
Building the Armies: You can get relatively cheap plastic 1/72 tank models, but they are much too large to use in this battle. Micro-scale tanks are available from specialty stores, but they are expensive. I would suggest looking for small cheap toys, such as those found in the board game Axis and Allies. I used paper tanks. Here are some paper tanks you can print and use.
Deployment: The Soviets and Germans deploy as shown on the map. The tanks don't have to be in a formation, but historically they would attack in a wedge.
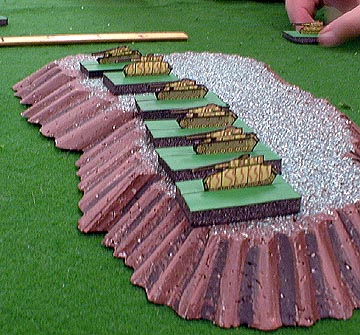
The Map: The battle was played on a 5' x 7.5' table. The battlefield is mostly open ground. The woods, hills, and village of Prokhorovka should be represented on the battlefield. They can be drawn with marker, outlined in felt, or modeled in detail. The rail line and Psel River did not have much effect on the battle, and don't have to be modeled.

Orders of Battle: The order of battle is simplified, and leaves out the infantry and anti-tank guns. This part of the Kursk battle was mostly tank versus tank.
GermanyII SS Panzer Corps Each Division has: |
USSR5th Guard Tank Army Each Corps above has: |
 Turn
Sequence:
Turn
Sequence:
1. Artillery
2. German Move
3. German Shoot
4. Soviet Move
5. Soviet Shoot
6. Air Attacks
Artillery: Each side rolls three dice to determine how many cotton balls they get to throw each turn. Each cotton ball represents an artillery or rocket barrage. The players must stand an arm's length away from their table edge, then they throw the balls onto the battlefield. Continue throwing the balls until all of them have been used. It doesn't matter if they bounce or roll, their final resting place is all that counts. If some of the balls end up off the table they are counted as misses. When all the balls have been thrown the damage is assessed. Any tank that is touching a cotton ball, or whose base is under a ball is removed. When in doubt, remove the tank. If any balls land on friendly tanks that's too bad, the tank is still eliminated.
Movement: All tanks can move 6".
Shooting: Tanks may fire in any direction at an enemy tank that is in range. Roll one die per tank. The chart indicates the number needed for a hit. Tanks that are hit are destroyed and removed (exception: see Tiger rule below). Tanks do block line of sight, so you can't shoot through friendly tanks.

| Range: |
|
|
|
| Tigers |
|
|
|
| T-70 |
|
|
|
| All other tanks |
|
|
|
Air Attacks: Both sides committed a lot of aircraft to the battle and fought a savage battle for control of the skies. Each side rolls two dice to determine who has control of the skies this turn. The difference in die rolls determines how many air attacks the winning side gets to make this turn. If the die rolls are tied neither side gets to make air attacks. The winning side places markers on the battle field to indicate where they want to make their attacks. The markers can be any small objects, such as red and blue poker chips (different colors should be used for the two sides). After all the markers have been placed the air attacks are resolved. Roll one D6 for each attack and consult the table for the results. If the attack is a HIT the player targeted chooses which tank is destroyed.

|
|
|
|
|
Oops, One friendly tank is destroyed if within 12" of marker, otherwise MISS |
|
|
MISS |
|
|
HIT - One enemy tank within 12" of marker is destroyed |
Terrain: The woods, hills, and village affect line of sight. Tanks can fire into and out of these terrain features, but line of sight can not be traced through them.
Tigers: The Tigers outgunned all the Soviet tanks, and have heavier armor. In order to destroy the Tigers the Soviet tanks had to charge to close range and hit them in the flank or rear. Tigers are immune to enemy fire from more than 6". At ranges 6" or less they get saving throws unless the fire comes from the flank or rear. Roll 1D6 for each hit eligible for a saving throw. If the Tiger rolls a 4-6 it ignores the hit, otherwise it is destroyed.
 Useful
Resources:
Useful
Resources: