 The
Battle of Zama
The
Battle of ZamaFast Play Rules for Students
The
Battle of ZamaVersion 2: This is the second version of the Battle of Zama Rules. The original version can be found here. Only minor changes have been made to the rules. New battle reports and pictures were added, and the list of resources was revised.
Historical Background: In the second century BC the rich trading empire of Carthage vied with the rising Roman Republic for control of the Mediterranean. In the Second Punic War Carthage's legendary general, Hannibal, surprised the Romans by crossing the Alps and invading their homeland. His army was too tough for the Romans to defeat on the field of battle, but not tough enough to capture Rome. Finally the Romans sent a young and ambitious general named Scipio to invade Carthage. The ploy worked, and Hannibal was summoned home to defend the city.
 The
decisive battle was fought in Zama, in Northern Africa. The battle
featured contrasting armies: the citizen soldiers of the Roman
Legions against the mercenary army of Carthage. The two sides
were closely matched. The Carthaginian army included close to
one hundred poorly trained war elephants. The tuskers were mostly
ineffective against the well-prepared Romans. On one flank the
Roman cavalry routed the Carthaginian cavalry and pursued them
off the battlefield. In the center the Carthaginians were on the
brink of victory when the Roman cavalry suddenly returned and
charged them from behind. This unexpected attack led to a rout,
and Rome won the battle and the war. Scipio was rewarded with
a name change, "Scipio Africanus," and a title, "The
Scourge of Carthage."
The
decisive battle was fought in Zama, in Northern Africa. The battle
featured contrasting armies: the citizen soldiers of the Roman
Legions against the mercenary army of Carthage. The two sides
were closely matched. The Carthaginian army included close to
one hundred poorly trained war elephants. The tuskers were mostly
ineffective against the well-prepared Romans. On one flank the
Roman cavalry routed the Carthaginian cavalry and pursued them
off the battlefield. In the center the Carthaginians were on the
brink of victory when the Roman cavalry suddenly returned and
charged them from behind. This unexpected attack led to a rout,
and Rome won the battle and the war. Scipio was rewarded with
a name change, "Scipio Africanus," and a title, "The
Scourge of Carthage."
Battle 1: The Romans commanders were content to fight on the defensive, and cleverly used their skirmishers to screen their cavalry and infantry. The skirmishers were able to neutralize the threat of the elephants without suffering much damage. The Carthaginians tried to push aside the Roman screen with their own skirmishers, but the Romans won that encounter. At last the Carthaginians sent their infantry into battle to try and break the Roman center. The attack, however, was piecemeal. The Carthaginians failed to follow up their initial successes, and the attack lost momentum. Their next move was to mass their reserves on the left flank for another attack. This opened a gap in their lines which the Romans were quick to exploit. The Numidian cavalry had been held back for just such an opportunity, and they raced into the gap with formidable speed. To their horror they found that they had ridden into a clever trap. The Numidians were enveloped and attacked from all sides. A brave unit of Carthaginian heavy infantry moved to block the Numidians retreat. Although attacked from three sides by the Romans, the heavy infantry stood their ground while the Numidians were cut to pieces. The battle, which had seemed to be going well for the Romans, was suddenly too close to call. On the other side of the battlefield the Romans had been making progress against the Carthaginian right flank. The Carthaginians responded by sending their top commanders to take charge of the situation. Several of the commanders were killed in the fierce fighting, but they crisis was averted. As the sun set in the West both armies were too exhausted to continue. The Romans claimed a slight edge in the days fighting, but they had failed to achieve the great victory Scipio had wanted.
 Battle
2: The Romans went on the attack, advancing behind their skirmishers.
The Numidian cavalry retreated behind the legions for protection.
This prompted cries of "cowardice," but it was in fact
part of the Roman battle plan. Scipio personally led the Roman
cavalry on an attack against their Carthaginian rivals. The Carthaginian
cavalry was routed, but Scipio suffered a mortal wound in the
fighting. The Roman attack began to break down. The Numidians
rode out to try and regain the momentum, but they were devastated
by rampaging elephants. The Roman cavalry, eager to avenge the
death of their commander, impetuously charged the Carthaginian
heavy infantry and were destroyed. The battle lines of both sides
broke down, and gaps opened up all along the battle field as the
commanders lost control. Casualties mounted rapidly and the battle
turned into a swirling, chaotic melee. Commanders led their men
into the enemy lines to exploit a flank, only to find themselves
receiving a charge from an unexpected direction. The Romans managed
to win a slim advantage on the battlefield, however the Carthaginians
had reason to celebrate. With the Roman army all but destroyed,
and Scipio dead, Hannibal and the Carthaginians now had a good
chance of winning the Second Punic War.
Battle
2: The Romans went on the attack, advancing behind their skirmishers.
The Numidian cavalry retreated behind the legions for protection.
This prompted cries of "cowardice," but it was in fact
part of the Roman battle plan. Scipio personally led the Roman
cavalry on an attack against their Carthaginian rivals. The Carthaginian
cavalry was routed, but Scipio suffered a mortal wound in the
fighting. The Roman attack began to break down. The Numidians
rode out to try and regain the momentum, but they were devastated
by rampaging elephants. The Roman cavalry, eager to avenge the
death of their commander, impetuously charged the Carthaginian
heavy infantry and were destroyed. The battle lines of both sides
broke down, and gaps opened up all along the battle field as the
commanders lost control. Casualties mounted rapidly and the battle
turned into a swirling, chaotic melee. Commanders led their men
into the enemy lines to exploit a flank, only to find themselves
receiving a charge from an unexpected direction. The Romans managed
to win a slim advantage on the battlefield, however the Carthaginians
had reason to celebrate. With the Roman army all but destroyed,
and Scipio dead, Hannibal and the Carthaginians now had a good
chance of winning the Second Punic War.
Rules
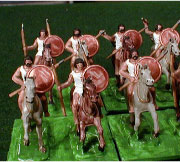
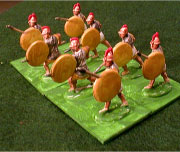
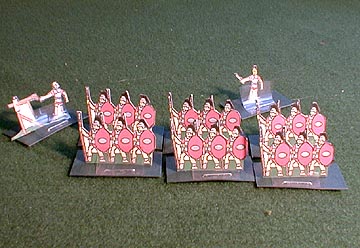
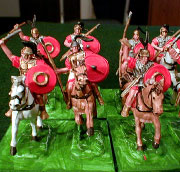
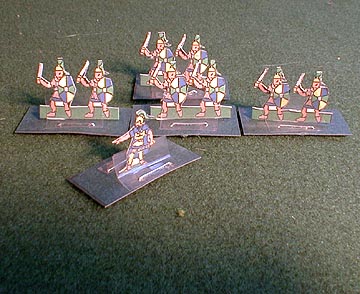
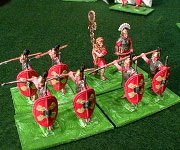
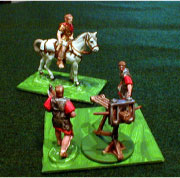
The Armies: The figures used were 1/72 scale plastics mounted two per stand, a mix from several sets (Italieri and Hat, with Celtic cavalry substituted for the Carthaginian cavalry). Skirmishers were arranged in single rank lines (3-5 stands), formed infantry and cavalry were in double rank lines (6-10 stands). Elephants and Scorpions were single stand units. Skirmishers and Elephants should be deployed in the front line. Here are some paper soldiers you can print and use.
|
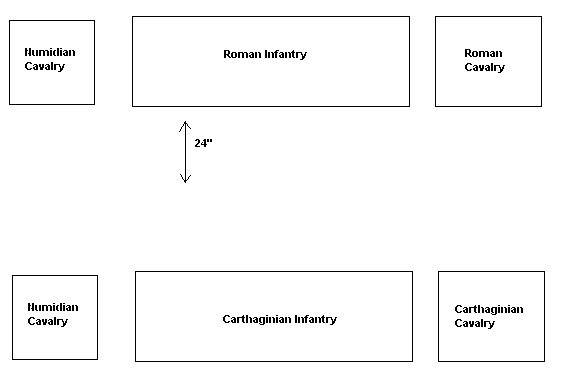
Romans: Scipio (Commander in Chief) 4 Infantry Commands each with: Roman Cavalry (left flank) Numidian Cavalry (right flank) |
Carthaginians: Hannibal (Commander in Chief) 4 Infantry Commands each with: Carthaginian Cavalry (right
flank) Numidian Cavalry (left flank) |
The Board: The terrain was flat and a 7.5' X 5' foot table was used. The armies began about 18 inches apart.
 Sequence
of Play:
Sequence
of Play:
1. Roman Move
2. Roman Shoot
3. Carthaginian Move
4. Carthaginian Shoot
5. Charge into Melee
6. Melee
Movement: All foot units move 6". Skirmish units may move in any direction. Formed units are limited to wheels and obliques of 45 degrees. Elephants and scorpions also move 6"; cavalry moves 12"
Shooting: Only skirmishers, Numidian cavalry, and scorpions are allowed to shoot. Roll 1D6 for each stand or scorpion in range. Scorpions hit on a 4-6, skirmishers and Numidian cavalry hit on a 6. Every hit eliminates one enemy stand. If any part of a unit is in range the entire unit may fire. Units that are engaged in melee may not fire, and may not be targeted.
 Charge
into Melee: Both sides may charge into melee. This is the
only way to get into hand-to-hand fighting. Foot units and elephants
may charge up to 6", cavalry may charge 12". Units may
only charge if they can reach an enemy unit.
Charge
into Melee: Both sides may charge into melee. This is the
only way to get into hand-to-hand fighting. Foot units and elephants
may charge up to 6", cavalry may charge 12". Units may
only charge if they can reach an enemy unit.
Melee: Each side rolls 1D6 for each stand in the fight. The Close Combat table shows the number needed to score hits. Remove one enemy stand for every hit. Both sides roll simultaneously. If both units still have stands left they remain engaged and fight again next turn.
Last Stand: If a unit is reduced to one stand this last stand is removed immediately. This rule doesn't apply to elephants and scorpions.
 Generals: Generals may not be targeted individually.
If they are attached to a unit they count as an extra stand in
melee (but not shooting). Scipio and Hannibal each count as two
extra stands in melee. If the unit they are attached to fights
in melee roll 1D6. If the roll is a 6 then the General is eliminated.
Generals: Generals may not be targeted individually.
If they are attached to a unit they count as an extra stand in
melee (but not shooting). Scipio and Hannibal each count as two
extra stands in melee. If the unit they are attached to fights
in melee roll 1D6. If the roll is a 6 then the General is eliminated.
Scorpions: These units may not charge or fight in melee. If an enemy unit charges them they rout and are eliminated.
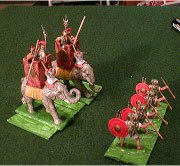 Elephants: Elephants cannot be eliminated by shooting
or in melee. They operate according to their own rules. If they
charge a unit of Roman infantry from the front there is a chance
that the elephant will be scared away - roll 1D6. If the roll
is a 5 or 6 the elephant is removed from the game (it stampedes
off the battlefield without causing any damage). Cavalry units
do not get a chance to scare away the elephant. Once the elephant
hits an enemy unit the victim loses two stands immediately. A
die roll is made to see if the elephant remains under control
after each round of melee. Roll 1D6 and consult the elephant table.
If the roll is a 1 or 2 the elephant remains under control and
may continue to fight or move next turn. A roll of 3 - 6 means
the elephant goes on a rampage and runs off the battlefield. It
immediately makes a double move (12"), passing through any
units (friend or foe) in its path. All units contacted lose two
stands. After completing this move the elephant is removed from
play.
Elephants: Elephants cannot be eliminated by shooting
or in melee. They operate according to their own rules. If they
charge a unit of Roman infantry from the front there is a chance
that the elephant will be scared away - roll 1D6. If the roll
is a 5 or 6 the elephant is removed from the game (it stampedes
off the battlefield without causing any damage). Cavalry units
do not get a chance to scare away the elephant. Once the elephant
hits an enemy unit the victim loses two stands immediately. A
die roll is made to see if the elephant remains under control
after each round of melee. Roll 1D6 and consult the elephant table.
If the roll is a 1 or 2 the elephant remains under control and
may continue to fight or move next turn. A roll of 3 - 6 means
the elephant goes on a rampage and runs off the battlefield. It
immediately makes a double move (12"), passing through any
units (friend or foe) in its path. All units contacted lose two
stands. After completing this move the elephant is removed from
play.
|
|
|
| Die Roll |
|
|
|
Remains under control |
|
|
Rampages 12" straight ahead |
|
|
Turns right (90 degrees) and rampages 12" |
|
|
Turns left (90 degrees) and rampages 12" |
|
|
Turns around (180 degrees) and rampages 12" |
Resources